Browsing Category:

Christmas

Christmas Party Dresses from JD Williams

JD Williams Party Dresses

I don’t usually wear party dresses, but I do make an exception for Christmas and weddings, so I was delighted when JD Williams asked if I wanted to choose some dresses. It’s nearly Christmas, obviously, and I have a wedding at the start of January 🙂

I’ve been a customer of JD Williams, in the past, so I knew the dresses would be of excellent quality.

Being a woman who wears plus size clothes, JD Williams is always the first place I go when I need a new outfit. I was able to pick 2 dresses from the long dresses collection. There were so many lovely ones, it took me ages to choose!

For the wedding, I chose this sparkly black one. Ella didn’t like the idea of my wearing a black dress to a wedding, but I told her it was totally fine to do so!

party dresses

I now have to buy new shoes and a clutch bag. Somehow I don’t think my huge handbag will look very good!

For Christmas Day we’ve got my father-in-law and 2 of my 6 step-children coming for dinner. I picked a lovely jade green lace dress and I can’t wait to wear it 🙂

Christmas party dresses


Now, I’m all set for Christmas day and the wedding. It’ll make a change being organised for the wedding so far in advance. I’m usually panicking, the day before, trying to find something to wear!

Christmas Pyjamas

Whilst looking for the dresses, I noticed the Christmas option on the menu and had to have a look!
I always buy the kids new Christmas PJs to open on Christmas Eve. I’ve needed new PJs for ages now. The ones I have were from JD Williams nine a few years ago and, after losing 7 stone, they keep falling down. I have to put a few stitches in the pyjama bottoms to make the waist a bit smaller. I don’t often buy clothes for myself (as you can see with the PJ situation!) so I thought it was about time I finally got new pyjamas, especially as they’re Christmas ones and I love Christmas so much. Having new Christmas PJs just seemed right! I’ve gone from a size 32 to a size 24 🙂

I decided to treat myself to new Christmas PJs so I’ve ordered these and they should be delivered in the next couple of days. I can’t wait to see them.

Mickey and Minnie Christmas shortie pyjamas JD Williams


All I need now is my own Christmas jumper and I’ll be all set! I think I’ll leave that until next year, though. I’m sure the super wonderful husband will agree that I’ve spent far too much on Christmas this year already!

Please note: I received the dresses in return for an honest review.

Candy Cane Christmas Tree #24XmasCrafts

Candy Cane Christmas Tree

These are lovely for the kids to make for friends at school and they don’t cost much.

You will need:

  • Green felt
  • Glitter glue
  • Scissors
  • A candy cane
  • A pen or pencil


Candy Cane Christmas Tree

Fold the piece of felt in half and draw half a Christmas tree, making sure to draw it on the folded side.

Candy Cane Christmas Tree

Cut out the tree and open it up. Lay the cane on the tree and mark where the cuts need to be.

Candy Cane Christmas Tree

Fold the tree in half make the small cuts where the cane will go.

Candy Cane Christmas Tree

Put the cane in the holes.

Candy Cane Christmas Tree

Decorate using the glitter glue and let it dry before giving it as a gift 🙂

Candy Cane Christmas Tree


Nearly there! Day 19 is a tutorial to make a salt dough photo frame gift.

To see all of the 24 tutorials, check out my Pinterest board

Paper Hand Wreath #24XmasCrafts

Paper hand wreath

I love this craft. I’m going to save this hand wreath to use every year because it’s lovely to see how small your child’s hands were.

Christmas paper hand wreath

You will need:

  • Christmas themed backing papers
  • 2 pieces of stiff card
  • Glue
  • Scissors
  • Ribbon
  • A small plate
  • A pencil

Christmas paper hand wreath

Place the plate on a piece of stiff card and draw around it. Cut out the circle.

Christmas paper hand wreath

Draw a smaller circle in the middle of the large one and cut it out.

Christmas paper hand wreath

On the other piece of stiff card, draw around your child’s hand. Cut it out and use this as a template. Now draw lots more hands on the printed backing papers. The number needed will depend on how big you’re making your wreath.

Christmas paper hand wreath

Cut out all the hands. This can take a while!

Christmas paper hand wreath

Glue the hands onto the card circle you make earlier, overlapping the hands to cover the card.

Christmas paper hand wreath

Tie some ribbon onto your wreath and hang it up 🙂

Christmas paper hand wreath


On day 18 we’ll be making a candy cane Christmas tree using felt.

To see all of the 24 tutorials, check out my Pinterest board

Fairy Tree Ornament #24XmasCrafts

Fairy Tree Ornament

Kaycee’s using our fairy tree ornament as the tree topper on her mini Christmas tree. Ella wanted one for hers so her daddy made her one. He used pom-poms for the face instead of card. Ella LOVEs it! 🙂

fairy tree ornament

You will need:

  • Paper or card
  • Scissors
  • Glue
  • String or ribbon
  • A mug
  • Gold or silver pen

fairy tree ornament

Draw around the mug and cut out the circle

fairy tree ornament

Cut the circle in half

fairy tree ornament

Using one-half of the circle, cut out 2 arm shapes

fairy tree ornament

Decorate the sleeves

fairy tree ornament

Cut out 2 hands and glue on to the sleeves

fairy tree ornament

The other half of the circle is for the fairy’s dress. Decorate it to match the sleeves.

fairy tree ornament

Fold the dress semi-circle into a cone shape and stick with glue or tape

fairy tree ornament

Make the head

Cut a small circle for the head then use it to draw hair on one-half of a folded piece of card. Fold the card and cut out the hair. Use this piece to draw around and cut out another shape.

fairy tree ornament

Stick the face on to one of the hair pieces.

fairy tree ornament

Use a folded piece of card to draw the wings on one-half next to the fold. Cut the wings out.
Cut a piece of string or ribbon that’s long enough to thread through the dress, have enough hanging at the bottom to make legs and enough at the top to attach the head too. Make a knot about 2 thirds down which will hold the dress in place and stop it sliding off.

fairy tree ornament

Thread the string through the dress

fairy tree ornament

To attach the head, first stick the piece of hair without the face, on to the string then stick the piece with the face, to the front of the hair, making sure the string is in the middle of the 2 pieces.

fairy tree ornament

Stick the wings and arms to the dress and thread some beads onto the string for the feet

fairy tree ornament

Hang on the tree or use as a tree topper like Kaycee has done on her mini Christmas tree!

fairy tree ornament

On day 17 we’ll be making a hand wreath using Christmas backing papers.

To see all of the 24 tutorials, check out my Pinterest board

Toilet Roll Tube Christmas Tree #24XmasCrafts Advent

Toilet Roll Christmas Tree

This toilet roll tube Christmas tree is a nice and easy craft for little hands to make.

You will need:

  • 4 toilet roll tubes
  • Green paint
  • Sticky tape
  • Stickers/Gems/Sequins to decorate


toilet roll Christmas trees

Use the first tube for the bottom of the tree then cut each tube a bit smaller. The top tube can be cut in half. Use one-half for the top of the tree and the other half for the trunk.

toilet roll Christmas trees

Stick the tree tubes together with sticky tape

toilet roll Christmas trees

Paint the tubes green and leave to dry

toilet roll Christmas trees

When the paint is dry, stick the trunk on and decorate

toilet roll Christmas trees

For day 16 we’ll be making fairy tree ornaments 🙂

To see all of the 24 tutorials, check out my Pinterest board

Dried Orange Slices Tree Ornaments #24XmasCrafts Advent

Dried orange ornaments

These are really simple to make and smell delicious when hung on the tree (well, they do if you like the smell of oranges and cloves!)
All you need is an orange, some cloves, and some ribbon to hang them up.

dried orange tree ornaments

Slice the fruit into 1cm thick slices. Place on an old tea towel and fold it over the slices. Press gently, soaking up as much juice as possible.

dried orange tree ornaments

Place the slices on a cooling rack and place into a preheated oven 140C/120C fan/gas 1. Leave in for 2-3 hours then leave in the oven to cool.

dried orange tree ornaments

While they’re still warm, push cloves through and make a hole for the ribbon.

dried orange tree ornaments


dried orange tree ornaments

Hang them from your tree or use to decorate gifts 🙂

dried orange tree ornaments

Tomorrow we’ll be making toilet roll Christmas trees 🙂

To see all of the 24 tutorials, check out my Pinterest board

Lolly Stick Snowflakes #24XmasCrafts Advent

Lolly Stick Snowflakes

Day 13 already?! Christmas will be here before we know it! Today we’re making lolly stick snowflakes.

You will need:

  • Glue
  • Gold spray paint
  • Decorations like gems and sequins
  • Lolly sticks


lolly stick snowflakes

Making sure to protect your surface, spray the lolly sticks gold and let them dry.

lolly stick snowflakes

Stick three together in a snowflake shape and decorate with the gems and sequins. Glitter glue would work well on these.

lolly stick snowflakes

You can attach some ribbon and hang them from the tree or just use some Blu-Tak to stick them on the walls.

lolly stick snowflakes

For day 14 we will be making dried orange Christmas tree ornaments. All you need is some string, an orange and some cloves.

To see all of the 24 tutorials, check out my Pinterest board

Paper angels #24XmasCrafts advent

Paper Angels

It’s day 12. Ella made the paper angels for our tutorial today. She did ask me for a help with a bit of the cutting but the decoration is all hers!

You will need:
  • Plain paper
  • A small plate
  • A pencil
  • Scissors
  • Stamps and glitter glue for decorating
  • Sticky tape (not shown)

paper angels tutorial

Draw around the plate

paper angels tutorial

Cut out the circle and fold in half

paper angels tutorial

Using a lid from a soda bottle, draw around it, above the centre fold.

paper angels tutorial

Draw a straight line from the top of the small drawn circle, up to the top of the large circle.

paper angels tutorial

Cut down the line and stop when you get to the small drawn circle.

paper angels tutorial

Draw lines either side of the small drawn circle to make the wings.

paper angels tutorial

Cut out along the lines as in the picture below.

paper angels tutorial

Draw some triangles on the wings as in the photo.

paper angels tutorial

Cut out the triangles

paper angels tutorial

It’s hard to see on the photo but you need to draw a bigger circle around the first small circle you drew.

paper angels tutorial


Cut along the lines of both circles on one side, stopping when you get to the centre line. This will make an arm.

paper angels tutorial

Do the same to the other side.

paper angels tutorial

Fold down the top half of the circle.

paper angels tutorial

To make the angel’s halo, fold a piece of paper in half and draw half a halo along the fold then cut it out. Use glitter glue to colour the halo and let it dry.

paper angels tutorial

Lift the wings and arms up and out of the way. Decorate the angel’s dress.

paper angels tutorial

Draw on her face.

paper angels tutorial

Fold her dress into a cone shape and secure with sticky tape.

paper angels tutorial

This is what you should now have.

paper angels tutorial

Stick the halo on with sticky tape.

paper angels tutorial

You could decorate the wings with glitter glue if you wanted 🙂

paper angels tutorial


Tomorrow is day 13 and we’ll be making Lolly Stick Snowflakes.

To see all of the 24 tutorials, check out my Pinterest board

Tealight Christmas Trees #24XmasCrafts Advent

Tealight Christmas Trees

Day 11 of our #24XmasCrafts advent and today we’re making tealight Christmas trees.

You will need:

  • A battery operated tea light
  • Printed Christmas card or paper
  • Ruler
  • Pencil
  • Scissors
  • Glue
  • Something pointy to make holes in the card

Tealight Christmas Trees

Draw a square that’s big enough to fit your tealight on and draw round it. Add more squares to make a 9 square grid.

Tealight Christmas Trees

Draw triangles on the four middle squares as in the photo.

Tealight Christmas Trees

On one side of each triangle, draw a flap which will be used to stick the sides together.

Tealight Christmas Trees

Cut it out

Tealight Christmas Trees

Score every line to make it easier to fold

Tealight Christmas Trees

Using something sharp and pointy, poke holes on every triangle to let the light shine through

Tealight Christmas Trees


Tealight Christmas Trees


Tealight Christmas Trees

Now fold up the triangles and glue each flap, one a time. Stick together to form a pyramid.

Tealight Christmas Trees

Place on the light and switch it on 🙂 If we get time, we’re going to make more using different patterns and sizes.

Tealight Christmas Trees


Half way there already! For day 12 of our 24 Xmas crafts advent, we’ll be making paper angels.

To see all of the 24 tutorials, check out my Pinterest board

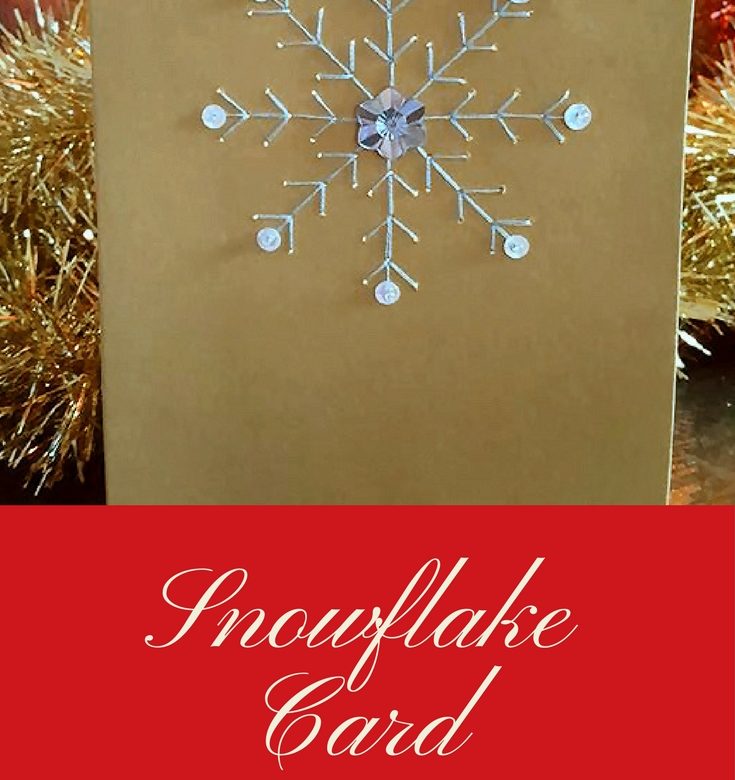
Embroidered Snowflake Card #24XmasCrafts Advent

Snowflake card

Not only is it day 10 of my #24XmasCrafts Advent, it’s also our last monthly Bostik Bloggers Craft Challenge. The theme is snow so I’ve made an embroidered snowflake card 🙂

You will need:

A blank card
An embroidery needle
Something sharp and thin to make the holes (you can just use the needle but I found this small screwdriver easier to hold)
Embroidery thread
Sequins
Beads
A gem
Glue

embroidered snowflake card

Start by printing out a snowflake template and tracing it onto baking paper if you don’t have tracing paper. There are some templates here.

embroidered snowflake card

Using Blu Tak, attach the baking/tracing snowflake in position on the blank card. Using the needle or other pointy object, like my screwdriver, poke holes at all the points of the snowflake.

embroidered snowflake card

Thread your needle with your selected colour thread (I used 2 strands) and knot the end. Start embroidering your card.

embroidered snowflake card


embroidered snowflake card


embroidered snowflake card


embroidered snowflake card

When you’ve finished embroidering the snowflake, add your first sequin. Bring the needle up from the back of the card and thread the sequin on. Now thread on the bead and put the needle back down through the same hole.

embroidered snowflake card

Continue adding sequins and beads to each point of the snowflake.

embroidered snowflake card

Glue your gem to the middle of the snowflake and send it to someone special 🙂

embroidered snowflake card


Day 11 already tomorrow and we’ll be making tealight Christmas trees 🙂

To see all of the 24 tutorials, check out my Pinterest board

Thanks to Bostik and Tots100 for a year of fun; the girls looked forward to the boxes arriving every month 🙂

Verified by MonsterInsights