
Browsing Tag:

Home Improvement

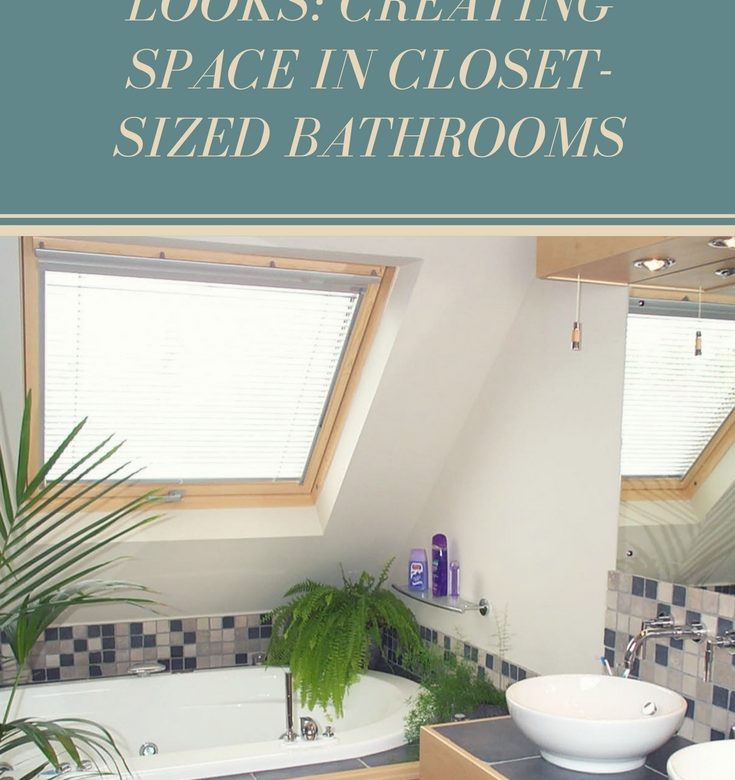
Bigger Than It Looks: Creating Space In Closet-Sized Bathrooms

Creating Space

Let’s face it, we all spend a lot more time and money on (and in) the rest of our houses than we do our bathrooms. How many of us have beautiful living rooms and bedrooms, and tell ourselves that we’ll get round to the bathroom one day, then forget about it for another year? The problem with bathrooms is that they’re functional: they’re ultimately there to serve a purpose. And besides, I’m sure we’re all guilty of thinking that it’s not worth spending too much on doing the bathroom up, seeing as it’ll probably end up getting damp anyway.

But that doesn’t have to be the case. There are loads of ways to make your bathroom into the crowning jewel of your home. If you’re put off by the fact that your bathroom is barely bigger than a closet, the first step to making a difference is obvious. Work a little magic to make the bathroom feel larger than it really is. This might sound impossible (it’s not the TARDIS, after all), but making your bathroom appear larger can be deceptively simple.

bathroom - creating space

Image Source

Fresh paint

To start with, you could rethink your colour scheme! Whilst a dark colour scheme can make your bathroom look stylish and modern, it can also be counterproductive. Painting your bathroom in lighter colours, such as white, pale blue, or light grey, makes it feel a lot more airy and spacious. Darker colours can often make rooms feel claustrophobic, which, in turn, gives makes them actually feel smaller than they really are. Furthermore, a lighter colour scheme can be accentuated by your bathtub, as they are generally white. On this note, if you have a bathtub in a different colour, then try and think about colours that can work with it. For example, a grey bathtub could work well in a light blue room, as the contrast can break up the block of colour.

Light design

Installing brighter lights will really accentuate your new colour scheme. A lot of bathrooms get very little natural light, so a lot of us don’t realise the importance of light in making bathrooms look bigger. Whilst you could go down the cheaper route, and install a brighter light bulb, there are other options. A lot of people prefer installing spotlights in their bathrooms. This allows the lights to be pointed in in different directions, which gives the illusion of space. Furthermore, as you can point the lights where you want, spotlights can be much more practical than a standard light bulb, as you can aim the light where you need it most, making it easier to shave or put on makeup.

loft conversion - creating space

Image Source

Reflection

Most people make do with one or two mirrors in their bathroom. However, when it comes to mirrors, go big or go home! Rather than a small mirror, why not try putting in a full length one? Or, if you can afford to be a bit flash with your cash, then install a huge mirror on one of the walls, rather than tiling it. In a stroke, you’ve made the room feel like it’s twice the size that it really is.

Storage units can also be a boon. Having all your personal grooming products spread out all over the room makes the place look cluttered, untidy, and of course, smaller than it is. By investing in a set of drawers, or a mirror cabinet from Drench, then you can keep all your grooming equipment in one place. This is more practical and frees up a lot of space, allowing your room to look emptier, and accordingly larger. By being clever, and choosing a shelving unit that fits in with the colour scheme, you can make your bathroom look beautiful as well as functional. Mirror cabinets also kill two birds with one stone by combining storage and reflections.

Tiles

If your bathroom is narrow, then you can put in tiles that emphasise the width of the room, rather than the length. So, rather than putting tiles lengthways, which can make your bathroom feel like a tunnel, try putting them horizontally, lending your bathroom the impression of much-needed width. If you’re prone to indecisiveness, you could use removable adhesive tiles to complete the appearance of your bathroom.

So, bathrooms don’t have to be the forgotten room. If you can manage to make yours appear bigger, then you’ll be surprised at the difference that it makes. Once you’ve made a few improvements, you’ll wonder how you ever coped with your old, cramped-feeling bathroom.

bathroom - creating space

Image Source

This is a collaborative post

Revamping Your Kitchen? 5 Ways to Make the Process Easier and Stress-Free

 This is a collaborative post

Revamping Your Kitchen

tips for revamping your kitchen

Are you planning on revamping your kitchen? Well, there’ll be nothing nicer than the end result: just think of those sunny mornings, long Sunday afternoons or leisurely evenings cooking for your family, all in the comfort of your brand new kitchen! Here’s how to make the process easier and as stress-free as possible…

1. Nail down your budget

Switching up your kitchen isn’t likely to be cheap. In fact, you can expect to spend at least £3,000 on a basic upgrade, but upwards of £10-20k if you want something of higher quality. Whatever the case (and however much cash you have to play with), it’s important to have a budget in mind. Have a clear idea of where your finances are coming from, and then start gathering quotes from kitchen fitters, builders and anyone your friends and family can recommend to you. Allow some contingency budget (for anything you forget, or any unforeseen work that needs doing) – that way, you’ll be reducing unnecessary stress or a sleepless night later down the line.

revamping your kitchen

2. Gather inspiration (but be realistic)

Next, the fun bit! Start gathering inspirational photos to help you achieve the look you’re going for. Pinterest is a great resource for this, and so is Houzz, but there are plenty of interior design blogs you can read for tips, tricks and home tours if you feel like being nosey. However, make it low-stress by carefully examining each image you’re drawing inspiration from: note down what it is you like about each image in particular (as this will help you to see common threads between designs and styles), and pay attention to the things you can’t replicate in your home. For example, monitor your expectations if you’re lusting after a kitchen in a Manhattan loft but you only have a 1970s semi in the UK: you can replicate some elements, but your kitchen won’t necessarily have the height and grandeur of some of the designs you see online.

3. Write up a plan

Once you have an idea of what you want to do with your kitchen, it’s a good idea to draw a plan. This can be as rough and ready as you like (it doesn’t need to be anywhere as neat as a professional would make it), but it just needs to show where everything is going to go. Have you accounted for extra plug sockets, gas and water supplies, light switches or any other hidden essentials you might not have first thought of? Marking all this stuff up early on will mean you can have it all fitted before your new cabinetry, tiles and worktops go in.

4. Choose your appliances carefully

Your kitchen appliances are some of the hardest-working belongings you’ll own, and as Fisher & Paykel say, your fridge is likely to be the most open door in your house. So, spend plenty of time researching where you’re going to buy your fridge, cooker and other workhorse appliances from. Choose the highest quality you can afford on your budget, and take the opportunity to consider choosing a bigger or ‘fancier’ model with more functions and gadgets – after all, a kitchen revamp is the perfect time to upgrade the quality of your life, as much as the look of your home.

revamping your kitchen

5. Scale back if you need to

Finally, if things aren’t going to plan, you could scale back on your kitchen revamp… For example, rather than refitting your entire kitchen (if that was your original intention), you could make the process a lot less stressful (and an awful lot easier) by simply changing the cabinet doors out for something like one of the options here. This will drastically reduce costs, time and mess, while providing quick and impactful results. Swapping out your existing kitchen handles for something more luxurious too will also change the look and feel of your kitchen, and again, it doesn’t take too much planning, money or time to do.

Armed with these tips and tricks, your kitchen revamp should be stress-free and easy. So, remember to take before and after photos, and enjoy the results!

3 Reasons Your House Needs A Dressing Room

Dressing Room

It sounds like the ultimate in home luxury, the dressing room. An entire room just dedicated to clothes, where you can stand in front of a mirror and mix and match outfits.

It might not be feasible in the current layout of your house if you don’t have a spare room, so your eyes are already glazing over and thinking this is irrelevant for you.

Well… you could always create one.

A room is ultimately defined by a wall and a door. If you have an area you could wall off, you could create a separate dressing room just from the existing rooms in your house. Obviously, you’d need the funds to do this and the help of an able builder, but it’s not a huge job that requires in-depth structural work. It might be more feasible than you think.

If you have a spare room already or are now already working out if you could create one, then you might need some convincers as to why it should be a dressing room. Fortunately, there’s plenty of arguments in the “pro” column…

#1 – No More Wardrobes

Unless they are built-in, wardrobes are generally a nuisance. Not only can you expect to pay the best part of £200 for one that isn’t going to fall down the moment you touch it, but they’re also big, bulky, and generally a pain to deal with. They make a room look cluttered even if it’s not.

With a dressing room, the need for a wardrobe evaporates. You can use that space in your bedroom for a proper purpose, moving all of your clothes into a dedicated area. It can be a room for the entire family, too – you could each take a wall and use it for your own purposes.

#2 – It’s A Dedicated Space, So You Can Use It As Such

The idea of lining the walls of your bedroom with clothing rails isn’t very attractive if we’re honest. It’d look messy; that’s why most of us go for a wardrobe, even if we acknowledge they’re not the best pieces of furniture.

But a dedicated dressing room? Well, the sole function of that room is to house clothes – so you can line the walls with as many rails as they can hold. A few shelves just off the floor and you’ve got your shoe storage, too. It doesn’t matter if it looks a bit messy, as apart from getting dressed, you’ll rarely be in there. It might sound like an exaggeration, but you could easily triple your clothing storage space just with this one alteration.

#3 – It Makes Life Easier

Tired of going from room to room after doing the washing, dropping items off into the relevant area for each family member? Then doing the same when they’re dirty and in wash baskets? A dressing room eliminates all that. All clothes-related activities are confined to one area, so you can keep track of where everything is all the time. Who knows, it might even stop you from losing socks – though no promises on that one!

Dressing Room
Image by Luis Rainero from Pixabay

You might even have to go on a few shopping trips to fill it!

This is a collaborative post

Giving Your Home a Classy, Sophisticated Look

Classy, Sophisticated Home

This is a collaborative post

Many homes these days try to achieve a modern look, but to some people, the old way will always be the best. If you agree with that, then why not give your home a classy look, one that speaks more to the past than to the future? You might be in the minority – as everyone’s marching to the future – but in years to come, your home will continue to look good. Achieving this look isn’t as difficult as it sounds, either.

sophisticated home

Source: Pexels.com

The Decor

The decor is the groundwork of the home. Get this right, and everything else will fall into place. When it comes to deciding on your colour scheme and the like, take a look at traditionally arranged homes. Some homes that go with this approach also blend it with a modern twist, and that’s just fine; indeed, gives you the best of both worlds. Finding furniture in a classical style, one that lends itself more to aesthetics over comfort, and chandeliers, too, is a good start.

An antique fireplace can further enhance this classic aesthetic, acting as a striking focal point that brings warmth, character, and a sense of history into the space. Whether crafted from stone or marble, these fireplaces pair beautifully with traditional furniture and ornate lighting, reinforcing the timeless appeal of the décor. Specialists such as Nostalgia UK and similar others offer carefully sourced antique and reproduction fireplaces that complement both purely traditional interiors and those with a subtle modern influence, helping create a space that feels elegant, distinctive, and enduring.

Adding Touches

A classy look should be generally minimalist in its approach, but in line with the old way of doing things. For example, you might go for exposed wood floors rather than carpets, and you’ll have traditional radiators installed rather than modern ones. Your infrastructure, too, will be more antique than modern. While not devoid of technology altogether, your home will be like a home that stands alone with technology as an extra, rather than technology infused at every step of the way. This approach is all about choosing features that feel timeless and intentional, rather than chasing short-lived trends or overly sleek finishes. Subtle details, such as softly lit vintage table lamps placed in reading corners or beside sofas, can reinforce that sense of understated elegance without overpowering the space.

These lighting choices do more than just illuminate a dark corner. A carefully placed handmade mosaic lamp is a simple way to introduce both color and warmth to a room. When the light passes through the colored glass pieces, it casts soft patterns across the walls. This kind of detail fits well with a classic style because it feels crafted by hand rather than mass-produced. It adds a layer of character that makes the space feel lived-in and comfortable.

An Intelligent Home

A classy home doesn’t have wires running everywhere, hooking up games to television screens and the like. It’s more academic. Adding a few shelves of second-hand books can really transform the look of a home, making it seem more sophisticated in the process. Also, find some pieces of art – any art – that you like, and place them around the home. These, along with the books and antiques you own, will all combine to create a home that would look just as in place in any other period as it does today.

In the Garden

You can’t have a classy interior and then have a messy garden. Your garden needs to be an extension of what you’re trying to achieve in the home. Keep it landscaped, with plants and the like well took care of, and of course, the grass freshly cuts often. A pond and a few wooden structures will also help contribute to a classy look.

Fashion, Style

It’s not easy trying to follow a sophisticated home decor plan, especially as there are more rules attached to this type of home decor than they are other styles, but stick with it. When everybody else is trying to find the freshest, most modern home filled with all the technology, you’ll be designing your home in a style that is less reliant on trends and fads. As they say, fashion comes and goes, but style lasts forever: and of these two, your home will most definitely be in the latter category.

Bathroom Improvement Tips

This is a collaborative post

When you move into a new place, you can instantly see the decorating potential for each room as you start to unpack. However, the bathroom seems to be the undisputed exception to this rule. While you might find yourself routinely rearranging furniture in the living room, reorganising your kitchen, and making little changes to the bedroom, the bathroom looks exactly the same as when you moved in. This might be because you feel that, being such a small space, there’s not much you can do with the bathroom. But believe it or not, the bathroom has just as much decorating potential as the rest of the house. Keep reading for some simple bathroom makeover tips.

Bathroom Improvement

Image Source

Tiles

Most bathrooms are decorated with tiles because they are easier to clean and maintain than paint or wallpaper, particularly when you factor in the excessive steam that will come from the shower. However, this means that changing the colour scheme in your bathroom will be really time consuming and expensive, or so you think. You don’t have to spend a lot of money on taking them down and putting up new ones. Removable adhesive tiles are quick and easy to put up, and they don’t damage the walls when you take them down. This is a great feature when you’re renting, or when you want to redecorate again.

Towel radiator

If you have a particularly small bathroom, a towel radiator is a perfect way to keep the space warm, especially during the winter months. They fit tightly on the wall, can squeeze into those awkward corners and do not sit on the floor taking up essential space as a standard radiator would. The design of radiators has come a long way, so look on websites like Warmehaus for a contemporary design that complements the style you’re going for. You’ll enjoy taking baths a lot more once you know you won’t be cold getting out of the tub.

Lighting

A new lampshade can dramatically alter the look of the room for the better. Glass lampshades are a great place to start with this. They won’t get damaged by steam, and are fantastically easy to wipe down if they become dirty, unlike a standard fabric lampshade. Whilst it’s easy to think of glass lampshades as plain, there are hundreds of different styles available to you: from minimalistic black and white to bold, powerful colours, and even nautical designs.

Countertops

Updating the countertops can change the whole appearance of the bathroom in just one step. Rather than plain old white, which easily shows up the dirt, there are many other options available. Despite being expensive, granite countertops are worth considering. A quick wipe-down with warm water is all it needs to stay clean, and they are so durable and low-maintenance that you’ll never need to replace them. Each granite worktop has patterns and whirls that are as unique as someone’s signature. Laminate glass is also easy to clean, and it can give your bathroom and sleek, modern look.

Bathroom Accessories

Adding accessories can significantly complete the overall setup of your bathroom. When choosing your bathroom décor and furnishing, aside from their design and aesthetic appeal, you must also consider if these materials can be placed in a high-moisture environment. For instance, you can opt for metals such as brass, bronze, or nickel since they are known to withstand moisture and constant exposure to water. 

Furnishing your bathroom with accessories such as a soap dish or dispenser, toothbrush holder, and the likes can make your space both functional and stylish. Additionally, you can install grab bars in your bathroom walls to help prevent accidents. You can mount a grab bar either in the shower or right by the bathtub for accessibility purposes.

You can also install towel hooks or bars, which allow your towels to air dry effortlessly. Aside from this, you can have the opportunity to display your beautiful bathroom linens. The market today has a variety of options for bath towels to choose from- different styles and different materials. But since towels play a very important role in our hygiene, it is best that you get yours from a reputable towel manufacturer.

Moreover, it’d be good to note that the key to accessorizing is to keep it simple and minimal. You wouldn’t want to crowd your space with so many accessories and furnishing. Know what you need and the amount of space you have, that way, you won’t go over the top and cramp your bathroom space.

Take Away

Improving your bathroom can be an exciting project. It’s a great way to upgrade your living spaces while allowing you to add a personal touch to the design elements framing it. And considering the above-mentioned tips can be a good start to your renovation project.  

Sensible Improvements for a More Practical Home

This is a collaborative post

Your home needs to work for you, whether you spend a lot of time in it or not. It should fit in with your lifestyle and help to make your life easier as much as possible. While you want to make your home look stylish, it’s also important that it’s practical. Fortunately, it can do both things at the same time. You can make your home more practical while ensuring it’s also attractive. Some easy changes can give you a home that works for you, without anything that just gets in the way or causes extra work for you.

Image credit: Pixabay

Practical Bathroom Updates

In the bathroom, you need to make sure the space is set up for all your necessary washing needs and other tasks. While the bathroom is a great place to relax with a shower or bath, it’s also one of the rooms you use most in your home. Everyone is always going in and out for various reasons. If you want a more practical bathroom, turning it into a wetroom is one thing you can consider. When you want to clean it, you can simply hose it down, without worrying about what you’re getting wet. It’s quicker and easier than scrubbing things by hand. Pairing this functionality with thoughtfully designed fixtures and storage, such as those you can purchase from companies like Madeli (you can see Madeli range here), can also help create a space that balances durability, organisation, and modern style for everyday comfort.

In the Kitchen

Your kitchen needs to be a practical space too so you can get on with cooking. It’s a good idea to think about how you use your kitchen and what could help you. A new kitchen sink with two bowls could be a practical solution for you. Some appliances could be good practical solutions for you. For example, a slow cooker makes it easy to get dinner ready in advance and leave it to cook while you’re busy.

improvements

Image credit: Pixabay

Entrances and Exits

Some of the areas of your home that see a lot of foot traffic are the entranceways. People come in and out, taking off and putting on shoes and outerwear. They can end up getting blocked by things left lying around or even just people standing in the way. You can make them more practical with a few solutions. Firstly, a mat makes sure that everyone has somewhere to wipe their feet. A bench gives them somewhere to sit and take off their shoes and could also double up as a shoe cabinet. You can use stands, rails, and boxes to store everything from coats to gloves and scarves.

improvements

Image credit: Max Pixel

Storage Around the House

It’s not just your entranceways where storage can be useful. You can make practical additions all around the house with the right storage. If you can afford to have custom storage solutions fitted, you can find the perfect answers to storing many things. In the bedroom, for example, you can choose storage systems that work for you depending on what you own and wear. Have a look at https://www.aplaceforeverything.co.uk/ for some storage ideas.

Some practical changes to your home can make it more suitable for you. You could save time and energy, too.

The 3 Best Types of Siding for Your House

Siding for Your House

3 best types of siding for your house header

New siding for your house can make it easier to sell. It can also give your house an attractive makeover. Sidings are not only decorative; they protect your house against the elements such as the wind, snow, and rain. Loose or cracked shingles or panels can make your house susceptible to more damage by moisture and insects, which can lead to extensive damage.

Siding contractors Rochester NY can help you ensure that your siding is appropriate and can keep your roof intact. Once you have decided to use siding, you need to determine which type of siding works best for your needs. The types of siding vary, and one may suit you better than others. It’s up to you to decide how much you want to spend and what priorities you have for your home. The following types of siding are considered to be the best in the construction industry and should be considered.

Vinyl Siding

  1. Vinyl siding. The low maintenance required and the low costs associated with vinyl siding make upkeep a breeze. It is by far the most popular choice for siding because it is resistant to twisting and warping. It also protects against water and insects. However, the downside to vinyl siding is that it can burn, rattle, and crack. Some types of vinyl siding may mimic the look of wood from afar, but not up close.

Fibre Cement Siding

  1. Fiber cement siding. This type of siding is a blend of cellulose, cement, and sand. It looks like real wood and the costs parallel those of vinyl siding. This type of siding is waterproof and insect-proof. However, it can be easily damaged if the paint is not maintained. Usually, fiber cement siding comes pre-painted from the factory, but specially painted siding can also be ordered.

Wood Siding

  1. Wood siding. Wood siding is costly, but it is unmatched by any the first two sidings in terms of look and feel. It is less less expensive than shingles, but more expensive than both vinyl or fiber cement siding. It is resistant to impact, but it can twist, burn, and break. In addition, it is not resistant to woodpeckers, which can damage the house. Wood can be left natural or finished. It is also available as factory-primed or pre-ordered with both primer and paint. Wood needs periodic maintenance in terms of paint. Factory-primed wood costs more, but it is worth it in the long-run.

Once you have decided on the type of siding that you feel is right for you, it’s time to contact a contractor who can cater to your needs. JJ Construction is a contractor located in New York, and our team of roof specialists and construction consultants will be happy to assist you any time. Finding a contractor for your construction needs should be hassle-free and worry-free. As such, JJ Construction is a prime choice for your needs. The company boasts of many projects that were successfully completed on time and with the highest quality.

This is a collaborative post.

What To Look For When You Hire A Remodelling Contractor

What to Look for Next Time you Hire a Remodelling Contractor

what to look for next time you hire a remodelling contractor
This is a collaborative post

Remodelling is one of the ways that you can improve your home. Although you can choose to renovate by yourself, there are projects that are best left in the hands of professionals. So if you’re looking to hire Kinnelon home remodeling, or a contractor close to you, here are a few things to consider.

Ask for referrals. If you personally don’t know a remodelling contractor, you can always ask around from people you know. Ask about whom they would recommend and if they had a good experience with that contractor. Positive feedback is important since you will be spending time and money with this person.

Check Credentials

Credentials matter. Once you receive referrals, it’s now time to do your research. Find out as much as you can about that contractor. You can do this via a phone call or check their website. Check if they have all the required licenses and insurance and if they are members or hold a position in professional associations. You can also check what examinations they have passed and what they are certified for. This can help you determine if the person has enough credibility and knowledge in working on remodelling projects. For your bonding needs, check out this California bond from contractorbondquote.com.

Sample Work

Look at sample work. Sample work allows you to see the quality of workmanship, the designs, creativity, and the variety of work done. This also lets you know what projects the contractor specialises in and will help you determine if they are the right person for the job. It’s important to pick someone who already has experience with the remodelling project you intend to have done since that person will know what issues to deal with and how to deal with them. It can also help to check character references and previous projects. This is a good time to find out their performance, the execution of the project, whether they were on time and within budget, and whether the final output satisfied the customer.

Interview Candidates

Interview candidates. Once you have shortlisted individuals, it’s time to set up a meeting and talk to them in person. The ideal number of candidates is three. You can check local contractors in your area since they are just nearby and you are familiar with the locality. This will also make it easy for you to check with your local Better Business Bureau to see if the contractor has a good record on file. In cases where you make a call or send an email and the contractor does not immediately reply, don’t be put off right away. It might be that they are working or doing remodelling jobs during that time since most remodelling contractors are owners and operators at the same time.

Set Guidelines

Set guidelines. Since these contractors will be working in and around your home, it would be best to give them guidelines before you decide to hire them. You might have conditions like what time you would like them to start working or if you want the project finished at a certain date. Let the contractor know this so they can adjust the schedule and to be clear on both sides as to what needs to be done to meet your requests.

Check The Contract

Check the contract. When everything is settled, make sure that you thoroughly read the fine print. The contract should include the total project cost, payment schedule, brands of items being installed or used, start and finish dates, as well as all the drawings that will be used along with written specifications.

Remember that remodelling jobs also take time. You wouldn’t want to rush a project and end up way over budget. Consider also that good contractors are typically booked at least two to four months ahead of time. Be cautious of those that can be booked right away. It could mean that they are not in demand or that they are willing to put another project on hold to start a new one. So make sure that you choose wisely.

Shower Room Makeover – Before And After

Shower Room Makeover

We’ve never really liked the pink fittings in the shower room. We’re saving up to have them changed but until then, we’ve decided to embrace the pink!

I’ve been searching Google and Pinterest for ideas on the best way to decorate a room with pink fittings.

I can’t say I’ve ever thought about decorating with grey. When the first coat had gone on the walls, I have to admit that I got a bit worried.
I asked Anthony if he thought we should go and buy the lighter grey that we’d seen at B&M but he said I should wait and see how it looked when the room was done.

He was totally right because I absolutely LOVE it!

Before

It always looked messy because there wasn’t enough storage. Only one of the cupboard doors opened which was annoying, especially for me because I can’t bend very well due to having a bad back. I couldn’t reach into the far corner of the side with the fixed door.

Shower Room Makeover Before and After

After

Taking the doors off opened up all that storage space and looked so much better.

Shower Room Makeover Before and After

Before

The paint didn’t cover very well when we first did it. You can’t see it on the photo, but when you go in the bathroom you can clearly see it looks all cracked.

Shower Room Makeover Before and After

After

We stripped off the wallpaper and painted the wall directly. It covered much better.

Shower Room Makeover Before and After

Before

This corner always looked grubby, no matter how many times it was cleaned.

Shower Room Makeover Before and After

After

I love it now, it always looks clean!

Shower Room Makeover Before and After

Before

You can see how this set of shelves got everything dumped on them. I really didn’t like it and was happy to see it gone!

Shower Room Makeover Before and After

After

It’s so much easier to get out of the shower without the shelves in the way 🙂

Shower Room Makeover Before and After

You can read more about shower systems here

Shower Room Makeover Before and After

My favourite new addition to the bathroom has to be the shelves Ant built. They’re perfect for our needs 🙂

Shower Room Makeover Before and After

I love reed and essential oil diffusers. This black reed diffuser was a cheap one from B&M. I bought it because it was black; I don’t usually buy cheap ones because they don’t usually work very well, but this one makes the bathroom smell wonderful.

Shower Room Makeover Before and After

Shower Room Makeover Before and After

I know these wall stickers have gone out of favour, but I still love them!

Shower Room Makeover Before and After

Shower Room Makeover Before and After

The room was done on quite a small budget. Most things were bought at B&M. The wall stickers were from eBay and the wood for the shelves came from B&Q.

B&M

  • Grey Emulsion Paint – £10
  • White One Coat Gloss – 10.99
  • Off Cut Lino – £20
  • You Only Live Once Picture – £1.99
  • Crystal Towel Ring – £5.99
  • Crystal Toilet Roll Holder – £4.99
  • 4 Pce Bathroom Set (soap dispenser, toothbrush holder, cup, soap dish) – £5.99
  • Wallpaper – £2.50
  • Overdoor Hanger – 3.99
  • Bathmat – £3.99
  • Shower curtain – £5.99
  • 3 Pce stacking baskets x 2 – £2.99 for 3
  • Medicine caddy – £2.49
  • Reed diffuser – £1.00
  • Shower head – £5.99
  • Bin and toilet brush – £5.99
  • Glass heart clip jar – £1.99

Ebay

  • 10 Pce towel bale – £13.99
  • Flower hair girl wall sticker – £3.49
  • Fairy wall sticker – £5.49
  • Shower track hooks and gliders – £2.69

B&Q

  • Conti Board – £27.50
  • Fixings – £6.00
  • Fascia tape – £15.00

Approximate total cost – £175

DIY projects for the New Year #HealthAndHome

Time for more DIY

We’ll have been living in our lovely home for three years in February next year. We’re so very happy here and I’m thankful every day that we live here 🙂
The only thing we’re not happy about is the bathroom. We did say when we moved in that we’d put up with it until we could afford to replace it. It’s pink. Very pink. I would have loved it back in the 80s but now I want something a little more modern!
Ant’s really good at DIY so he’s planning on fitting our new bathroom himself.

He fitted our new kitchen the year we moved in. I helped a bit by removing the tiles but I left the rest to him! He did a great job and it was such a relief to have a kitchen after being without one for so long.

As well as the bathroom, we also want to wallpaper and paint the living room and paint the hall, stairs and landing. When funds allow, Ant wants to build a utility room at the side of the house where our front door is. He needs more space in the kitchen and getting the washer and tumble dryer out would help enormously.

Lastly, he wants to put a wooden floor down on the patio. He built a cover over the patio last year and it’s been brilliant being able to store things outside without worrying about the rain.
We eat out there in the summer and the girls sleep out there on a fold down sofa bed. The new floor will be the finishing touch 🙂

Health and Home

As you can see, we have big DIY plans for next year. You can imagine how I felt when I saw the below infographic, knowing we’d got lots of things on the list, planned. I’d never have thought something so simple as removing wallpaper or tiles could cause an illness I’ve never even heard of, mesothelioma.

Slater and Gordon are mesothelioma lawyers. They’ve created this infographic to help bring about awareness of the different dangers when making improvements to your home.

If your home was built between the 1930s and the 1980s there’s a higher risk of having asbestos in your home. If you’re at all worried, you can have an asbestos survey to put your mind at rest.


Slater and Gordon DIY infographic


This post is brought to you in collaboration with Slater and Gordon.

Verified by MonsterInsights