Browsing Tag:

christmas

Lolly Stick Snowflakes #24XmasCrafts Advent

Lolly Stick Snowflakes

Day 13 already?! Christmas will be here before we know it! Today we’re making lolly stick snowflakes.

You will need:

  • Glue
  • Gold spray paint
  • Decorations like gems and sequins
  • Lolly sticks


lolly stick snowflakes

Making sure to protect your surface, spray the lolly sticks gold and let them dry.

lolly stick snowflakes

Stick three together in a snowflake shape and decorate with the gems and sequins. Glitter glue would work well on these.

lolly stick snowflakes

You can attach some ribbon and hang them from the tree or just use some Blu-Tak to stick them on the walls.

lolly stick snowflakes

For day 14 we will be making dried orange Christmas tree ornaments. All you need is some string, an orange and some cloves.

To see all of the 24 tutorials, check out my Pinterest board

Paper angels #24XmasCrafts advent

Paper Angels

It’s day 12. Ella made the paper angels for our tutorial today. She did ask me for a help with a bit of the cutting but the decoration is all hers!

You will need:
  • Plain paper
  • A small plate
  • A pencil
  • Scissors
  • Stamps and glitter glue for decorating
  • Sticky tape (not shown)

paper angels tutorial

Draw around the plate

paper angels tutorial

Cut out the circle and fold in half

paper angels tutorial

Using a lid from a soda bottle, draw around it, above the centre fold.

paper angels tutorial

Draw a straight line from the top of the small drawn circle, up to the top of the large circle.

paper angels tutorial

Cut down the line and stop when you get to the small drawn circle.

paper angels tutorial

Draw lines either side of the small drawn circle to make the wings.

paper angels tutorial

Cut out along the lines as in the picture below.

paper angels tutorial

Draw some triangles on the wings as in the photo.

paper angels tutorial

Cut out the triangles

paper angels tutorial

It’s hard to see on the photo but you need to draw a bigger circle around the first small circle you drew.

paper angels tutorial


Cut along the lines of both circles on one side, stopping when you get to the centre line. This will make an arm.

paper angels tutorial

Do the same to the other side.

paper angels tutorial

Fold down the top half of the circle.

paper angels tutorial

To make the angel’s halo, fold a piece of paper in half and draw half a halo along the fold then cut it out. Use glitter glue to colour the halo and let it dry.

paper angels tutorial

Lift the wings and arms up and out of the way. Decorate the angel’s dress.

paper angels tutorial

Draw on her face.

paper angels tutorial

Fold her dress into a cone shape and secure with sticky tape.

paper angels tutorial

This is what you should now have.

paper angels tutorial

Stick the halo on with sticky tape.

paper angels tutorial

You could decorate the wings with glitter glue if you wanted 🙂

paper angels tutorial


Tomorrow is day 13 and we’ll be making Lolly Stick Snowflakes.

To see all of the 24 tutorials, check out my Pinterest board

Tealight Christmas Trees #24XmasCrafts Advent

Tealight Christmas Trees

Day 11 of our #24XmasCrafts advent and today we’re making tealight Christmas trees.

You will need:

  • A battery operated tea light
  • Printed Christmas card or paper
  • Ruler
  • Pencil
  • Scissors
  • Glue
  • Something pointy to make holes in the card

Tealight Christmas Trees

Draw a square that’s big enough to fit your tealight on and draw round it. Add more squares to make a 9 square grid.

Tealight Christmas Trees

Draw triangles on the four middle squares as in the photo.

Tealight Christmas Trees

On one side of each triangle, draw a flap which will be used to stick the sides together.

Tealight Christmas Trees

Cut it out

Tealight Christmas Trees

Score every line to make it easier to fold

Tealight Christmas Trees

Using something sharp and pointy, poke holes on every triangle to let the light shine through

Tealight Christmas Trees


Tealight Christmas Trees


Tealight Christmas Trees

Now fold up the triangles and glue each flap, one a time. Stick together to form a pyramid.

Tealight Christmas Trees

Place on the light and switch it on 🙂 If we get time, we’re going to make more using different patterns and sizes.

Tealight Christmas Trees


Half way there already! For day 12 of our 24 Xmas crafts advent, we’ll be making paper angels.

To see all of the 24 tutorials, check out my Pinterest board

Embroidered Snowflake Card #24XmasCrafts Advent

Snowflake card

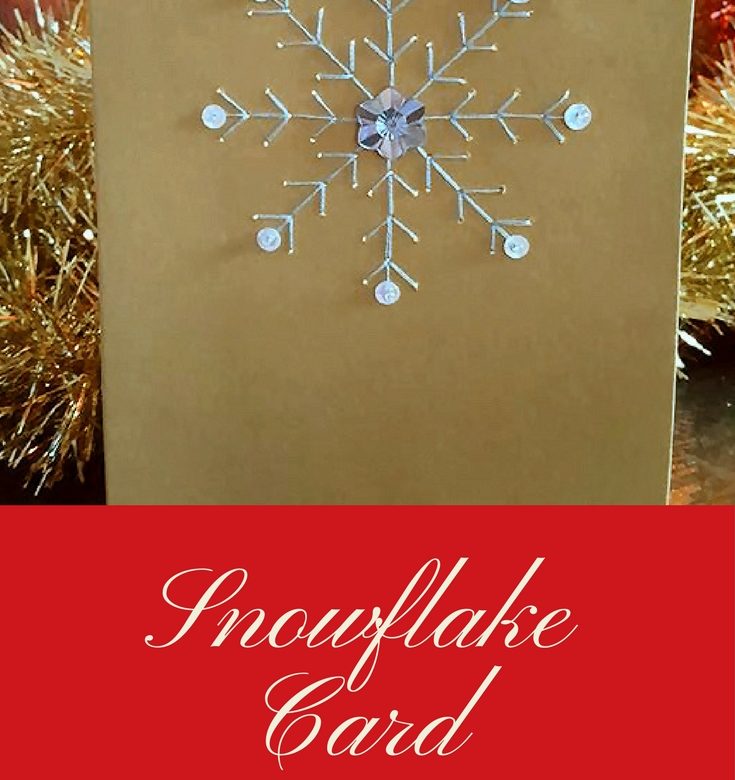
Not only is it day 10 of my #24XmasCrafts Advent, it’s also our last monthly Bostik Bloggers Craft Challenge. The theme is snow so I’ve made an embroidered snowflake card 🙂

You will need:

A blank card
An embroidery needle
Something sharp and thin to make the holes (you can just use the needle but I found this small screwdriver easier to hold)
Embroidery thread
Sequins
Beads
A gem
Glue

embroidered snowflake card

Start by printing out a snowflake template and tracing it onto baking paper if you don’t have tracing paper. There are some templates here.

embroidered snowflake card

Using Blu Tak, attach the baking/tracing snowflake in position on the blank card. Using the needle or other pointy object, like my screwdriver, poke holes at all the points of the snowflake.

embroidered snowflake card

Thread your needle with your selected colour thread (I used 2 strands) and knot the end. Start embroidering your card.

embroidered snowflake card


embroidered snowflake card


embroidered snowflake card


embroidered snowflake card

When you’ve finished embroidering the snowflake, add your first sequin. Bring the needle up from the back of the card and thread the sequin on. Now thread on the bead and put the needle back down through the same hole.

embroidered snowflake card

Continue adding sequins and beads to each point of the snowflake.

embroidered snowflake card

Glue your gem to the middle of the snowflake and send it to someone special 🙂

embroidered snowflake card


Day 11 already tomorrow and we’ll be making tealight Christmas trees 🙂

To see all of the 24 tutorials, check out my Pinterest board

Thanks to Bostik and Tots100 for a year of fun; the girls looked forward to the boxes arriving every month 🙂

Vintage Paper Tree Ornament #24XmasCrafts Advent

Vintage Tree Ornament

Our day 9 craft, a vintage paper tree ornament, is another one by the super wonderful husband. It’s quite time-consuming and the S.W.H. made it because he had more patience than I did!

You will need:

Christmas papers
Scissors
Glue
Pipe cleaners

(We used some thin waxy paper. Regular paper would have worked much better and we won’t be making the same mistake again!)

Ant cut all his pieces and folded them first. When you’ve decided on the shape you want, make a template. Use it to cut about 20 more shapes out of the folded pieces.

vintage paper tree ornament

Take two pieces and glue two halves together

vintage paper tree ornament

Carry on glueing the pieces together until you’ve glued most of them.

vintage paper tree ornament

Twist 2 different coloured pipe cleaners together and twist into to shape to make a hanger

vintage paper tree ornament

Glue in place then glue the remaining pieces of paper to form the ornament. Let it dry completely before hanging. You can see ours went out of shape because of the type of paper used. Regular paper or card would have been a better choice 🙂

vintage paper tree ornament

Day 10 of our #24XmasCrafts Advent tomorrow. We’ll be making an embroidered snowflake card in association with Bostik. It will be our last Bostik Bloggers monthly challenge 🙁

To see all of the 24 tutorials, check out my Pinterest board

Christmas Gifts at HomeSense

Gifts for Christmas at Homesense

You know HomeSense is one of my favourite shops, right? I really enjoyed browsing for Christmas gifts the other week. I was spoilt for choice.

I’ve done all of my Christmas shopping now but already I’m planning ahead for next year! I like making gift baskets for people and tailoring them to each person.
For Ant, I’d do a foodie gift basket because he’s really into his baking and cooking right now. I used to do the majority of the cooking but now he does it all and delicious it is too!

HomeSense has a great assortment of foodie items like this oak smoked rapeseed oil. He’d love this because he always uses rapeseed oil and he loves anything smoked!

Christmas gifts at HomeSense

I know a few people who would like these other foodie gifts

Christmas gifts at HomeSense


Christmas gifts at HomeSense


Christmas gifts at HomeSense
Don’t you just love the marshmallow snow?!

If anyone wants to buy me a present from HomeSense, I’d be very happy to get one of these tins containing panettone. I LOVE panettone but I love the tins even more. I’m thinking I could start a collection!

Christmas gifts at HomeSense


Christmas gifts at HomeSense


If you’re after something a bit different, there are some great games and funny gifts to choose from.

Christmas gifts at HomeSense


Christmas gifts at HomeSense


Christmas gifts at HomeSense


Christmas gifts at HomeSense


Christmas gifts at HomeSense


They have the usual smelly gift sets. Some people complain about smelly gift sets but I love getting them. I don’t buy myself indulgent bath products throughout the year so it’s nice to get some at Christmas.

Christmas gifts at HomeSense


Christmas gifts at HomeSense

My girls would love to get these on Christmas day 🙂

Christmas gifts at HomeSense


Christmas gifts at HomeSense


Thanks to HomeSense for my gift card. I treated myself to some new wine glasses to go with my Christmas dinner service and some Christmas wine glass charms 🙂

Paper Christmas Tree #24XmasCrafts Advent

Make your own paper Christmas trees

Here’s day 8 of our 24 Christmas crafts advent. The super wonderful husband made this paper tree using some Christmas backing papers I found in Lidl last year.

They’re easy to make and you don’t need many supplies.

You will need:

Christmas papers
Scissors
Glue

paper Christmas tree

Fold a piece of plain paper and draw a triangle down one side. Make sure you’re using the the folded side. You can leave it as a triangle or cut it out in a Christmas tree shape.

paper Christmas tree

This is your template.

paper Christmas tree

Use your template to cut 8 more trees from the printed Christmas papers.

paper Christmas tree

Now spread glue on one half of a tree and stick it to another tree.

paper Christmas tree

Keep sticking the pieces together until you’ve done all trees and you’re left with your Christmas tree 🙂

paper Christmas tree


Tomorrow, for day 9 of my #24XmasCrafts advent we’ll be making a vintage tree ornaments.

To see all of the 24 tutorials, check out my Pinterest board

It’s Christmas at the Ashmore House

It’s Christmasssss at the Ashmore house!

Putting the tree and decorations up on the first Saturday of December has become an Ashmore family tradition. This year was a busy Saturday due to Ella having a friend to sleep the night before. Also, Kaycee and Ella’s sister, Kellyann, wanted to take them to the Lincoln Christmas market.

We started decorating after lunch and managed to get the majority of it done by 6pm.
The girls had a wonderful time at the market with Kellyann and didn’t get home until gone 10pm!

Christmas at the Ashmore house

christmas-2016-02

Christmas at the Ashmore house

Christmas at the Ashmore house

The girls love the mini felt tree decorations I made to fit in the advent drawers of the wooden advent calendar 🙂

Christmas at the Ashmore house

Christmas at the Ashmore house

Christmas at the Ashmore house

Ant bought me the Christmas train when we first started Christmas shopping for decorations in October. He then bought me the paper village to go with it.
Not long after, we saw a pot village in Lidl and decided to buy it as well! It was 5 pieces and at the time, we didn’t notice there were actually 2 sets. We nipped back on Sunday and picked up the other set 🙂

We can’t eat at the table now during December but it’s worth it because I’ve wanted a Christmas village for ages!

Christmas at the Ashmore house

Christmas at the Ashmore house

Christmas at the Ashmore house

Not to forget, we also have our treat trolley that the kids look forward to every year 🙂

Christmas treat trolley


Folded Book Art Christmas Tree #24XmasCrafts Advent

Folded Book Art

I made a few folded book art Christmas trees from pre-loved books last year. They were for the charity shop where I volunteer in the book department. They were a big hit and I’ll be making some more this year. I made full Christmas trees and discarded the rest of the book that I didn’t need last year.

This year I’m making the tree inside the book and leaving the covers and extras pages intact.

Drop into your local charity shop and have a search for an old book if you want to give this tutorial a go. I’m using a copy of Charles Dickens’ A Christmas Carol to make mine so I can put in on my mantel this Christmas 🙂

I’m a bit of a collector of A Christmas Carol books. I can’t resist buying them when they’re donated to the charity shop!

You will need:

  • An old copy of A Christmas Carol
  • Glue
  • Gold glittery card
  • Glitter glue
  • Thin tinsel

A Christmas carol folded book tutorial

Find out how many pages your book has and start a third of the way through. Fold the top corner of the page into the spine.

A Christmas carol folded book tutorial

Now fold the page again into the spine as before

A Christmas carol folded book tutorial

Carry on folding pages until you have your desired Christmas tree shape

A Christmas carol folded book tutorial

You can fold the bottom corners of the book or cut them off if you prefer. I folded them.

A Christmas carol folded book tutorial

Make sure your book can stand up. Bend the cover pages back if needed to make it stable

A Christmas carol folded book tutorial

Now it’s time to decorate. I made a glittery star for the top of the tree and glued it on with hot glue. I then used hot glue to attach the tinsel.

A Christmas carol folded book tutorial

Using the glitter glue, put dots of different colours all over the pages.

A Christmas carol folded book tutorial

Let it dry and then your folded book Christmas tree will be ready to display 🙂

A Christmas carol folded book tutorial


Tomorrow, for day 8 of my #24XmasCrafts advent we’ll be making more paper Christmas trees. We’ll be using pretty backing papers rather than book pages 🙂

To see all of the 24 tutorials, check out my Pinterest board

Owl pine cone #24XmasCrafts Advent

Owl Pine Cone

Ella loved making her owl pine cone. We used the hot glue gun so I had to watch her closely but you could use PVA and let all the pieces dry before sticking them onto the pine cones.

You will need:

  • Different coloured felt pieces
  • Pine cones
  • Glue
  • Scissors
  • A pen or pencil
  • Ribbon (optional, not pictured)

owl pine cone

Draw your owl eyes, eyebrows, beak and wings (and belly if you’re using one) on your felt and cut them all out.

owl pine cone

Glue the eyes, beak and eyebrows together then glue the wing pieces together.

owl pine cone

Glue the face onto another piece of felt then cut around it. I did this to give us a bigger surface area for the glue

owl pine cone

Glue the face and wings onto the pine cone (and belly if you’re using one) then add some ribbon if you want your owl ornament to hang on the tree.

owl pine cone


owl pine cone


owl pine cone


Day 7 tomorrow and we’ll be making a Christmas tree in a book by folding the pages.

To see all of the 24 tutorials, check out my Pinterest board

Verified by MonsterInsights