
Browsing Tag:

Bostick Bloggers

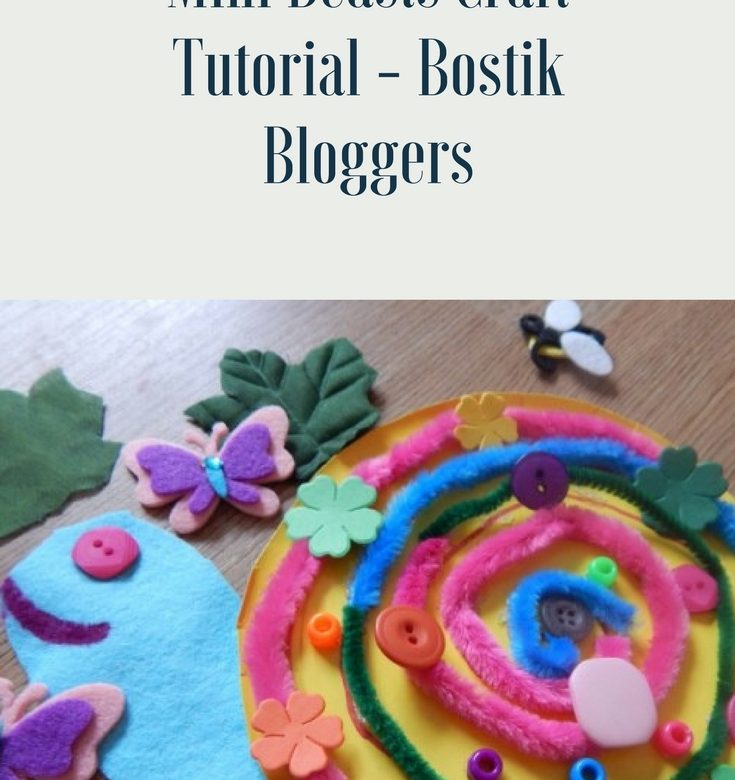
Bostik Bloggers Craft – Mini Beasts

Mini Beasts

The girls love getting the Bostik bloggers craft box every month and usually work together to make something but this month, Ella’s been really busy with one thing and another so Kaycee did it all on her own this month.

The theme is Mini Beasts. For more activities about this theme, click here

She took all the photos and is writing up the tutorial so I’ll hand over to Kaycee 🙂


Image26

what you need :

felt
buttons and other creative decorations
paper plate
pipe cleaners
sticky dots
marker pen

bostick-craft-bloggers-mini-beasts-01

draw a spiral onto a paper plate and then cut off the outside rim ( it does not matter if it looks a bit messy)

bostick-craft-bloggers-mini-beasts-02

using glue dots stick pipe cleaners tracing the spiral (again it does not matter if it looks messy)

bostick-craft-bloggers-mini-beasts-03

decorate in between the pipe cleaners using buttons and craft bits

bostick-craft-bloggers-mini-beasts-04

Then cut out (using felt) the shape of a snail body and stick to the back of your plate

bostick-craft-bloggers-mini-beasts-05

add a button as the eye and use the marker to draw a lovely smile!

bostick-craft-bloggers-mini-beasts-07

to add sturdiness attach two lollypop sticks to the back

bostick-craft-bloggers-mini-beasts-06

pierce a hole and thread string through it

bostick-craft-bloggers-mini-beasts-09

you can now hang it on the wall as a pretty decoration 🙂

bostick craft bloggers mini beasts


Great job, Kaycee 🙂

Thanks to Tots100 and Bostick for the monthly craft challenge.


shell-doll-sig-01

For more craft ideas, click here

Bunny Tails Easter Activity Tutorial #BostikBloggers

 The theme for our Bostik Bloggers craft challenge this month is Easter so the girls are making these lovely Easter gifts to give to friends at school. They’re very easy and cheap to make 🙂
Bunny tails marshmallow Easter gift - Easter activity

Easter Activity

You will need:
Small cellophane food bags
Card
A stick on spring flower
Decorative tape
A bunny shape cut out of card or like ours, a piece cut out of a sheet of foam
Adhesive
Double sided sticky pads
Felt tip pen
White mini marshmallows
Easter Craft supplies - Easter activity
Gather your supplies


Marshmallows and craft supplies - Easter activity


Bunny tails bag header card - Easter activity
Cut a piece of card the same width as your bag.
Our bags are 9cm x 13cm so I made the header 9cm x 7cm


Decorate bunny tails bag header - Easter activity
Decorate the header with the tape, flowers and rabbit shape then write Bunny Tails on it and fold it in half


Put marshmallows in bag - Easter activity
Fill the bag 3/4 full with marshmallows


Seal marshmallows in bag - Easter activity
Double fold the top of the bag and secure with some tape
Finished bunny tails gift bag - Easter activity
Use 4 double sided sticky pads, one on each corner inside the header to secure the header to the bag


Easter crafts bunny tails bag and Easter chick card - Easter activity
This is Kaycee’s bunny tails bag and an Easter decoration she made with some of the other craft materials.


Ella's Easter crafts - Easter activity
Ella made a little bunny family…


Ella's bunny tails - Easter activity
before making her bag of bunny tails 🙂

For more craft posts, click here

Valentine’s Card – Bostik Bloggers Challenge

Valentine's Card

We’re very excited to be part of the Bostik Bloggers family this year. We received our first craft box on Saturday and found time last night to make a Valentine’s card.
We wanted to be a little more creative with our first box but time wasn’t on our side this week!

Kaycee made a Valentine’s postcard, Ella made a Valentine’s picture card for her teacher and I made a Valentine’s card for Ant, which I’m going to show you how to make in the following tutorial.

Valentine’s Card

You will need:

A4 Gold card
Red glitter card
A piece of patterned fabric or backing paper
Gem heart stickers
Glue
Ribbon
Red glitter pen


Instructions

Fold the gold card in half.

Using the backing fabric/paper, cut 3, 5cm squares and glue them onto the card, overlapping them and rotated into diamond shapes.

Stick the gem hearts in a horizontal line, onto the top corner of the card. Cut a love heart shape out of the red glitter card and glue it onto the middle square

Using the red glitter pen, draw a love heart at the bottom corner of the card then stick the ribbon down the other side of the card.


You can still see the white glue on the card above but once it dries, it goes clear so you won’t see it 🙂

Here are Kaycee and Ella’s creations.

Ella’s card for her teacher (I covered her teacher’s name)


Valentine's card
This is Kaycee’s card. I’m not sure if she has a recipient in mind!


For more craft posts, click here

Verified by MonsterInsights